5 Easy Steps To Make an Infographic With Private Label Rights
Infographics are a great way to get content out to people. They love this type of format and as a blogger or online entreprenuer, it is important to know how to create them.
Here is a video tutorial on how you can create an infographic using your PLR.
Step 1 – Find Your PLR
Find a list from your PLR. This could be an article, blog post, eCourse email, product, etc. Anything works, as long as it has a list on it.
I used this product:
I took one of the eCourse emails and only used 5 of the 7 ideas that were listed for this email:
- Email Day 3 – 7 Great Apps For Managing Your Personal Finances On The Go (510 words)
If this isn’t your niche or you’re not talking about this topic with your subscribers right now you use any type of list to create an infographic as I did in the tutorial.
Check out these PLR Stores and see if you can find what you need (OR…check your hard drive):
There are some great PLR Sellers out there to pick from, so use a piece of content that you’ve already got or buy something to help you create one.
Step 2 – Decide How You’re Going To Create an Infographic
Pick how you’re going to create your infographics. There are several ways that you can do that. Here are some ideas.
Canva.com – Use the templates they have. This might work better for you project. Make sure it is a free template if you don’t want to pay for it.
Piktochart.com – This is a great site and is specifically geared towards creating infographics. I didn’t use this one for the infographic because I didn’t see any free templates that I wanted.
But I have used it in the past. Check out this tutorial on it HERE.
Templates – I actually used a template that I purchased.
You can find a few options here:
- Infographics IM Edition (this is the one I used)
- Infographics Business Edition
- Infographics Motivation
Grab them all in a bundle in this MEGA Infographic Pack
If you’re looking for a lot of different Infographic elements – Creative Market has tons. You’ll find bundles or individual packs. I found them by going to their search bar and typing in Infographic.
Step 3 – Start Creating Your Infographic With PLR
Start changing the template or creating your Infographic.
This is going to take you the longest time because you’re going to be doing the following depending on what you decided in step 2:
- Copy and pasting content
- Writing content (usually a minimal amount)
- Finding and downloading images (Pixabay)
- Creating or rearranging your graphics
You’ll see how I did it by using the video above.
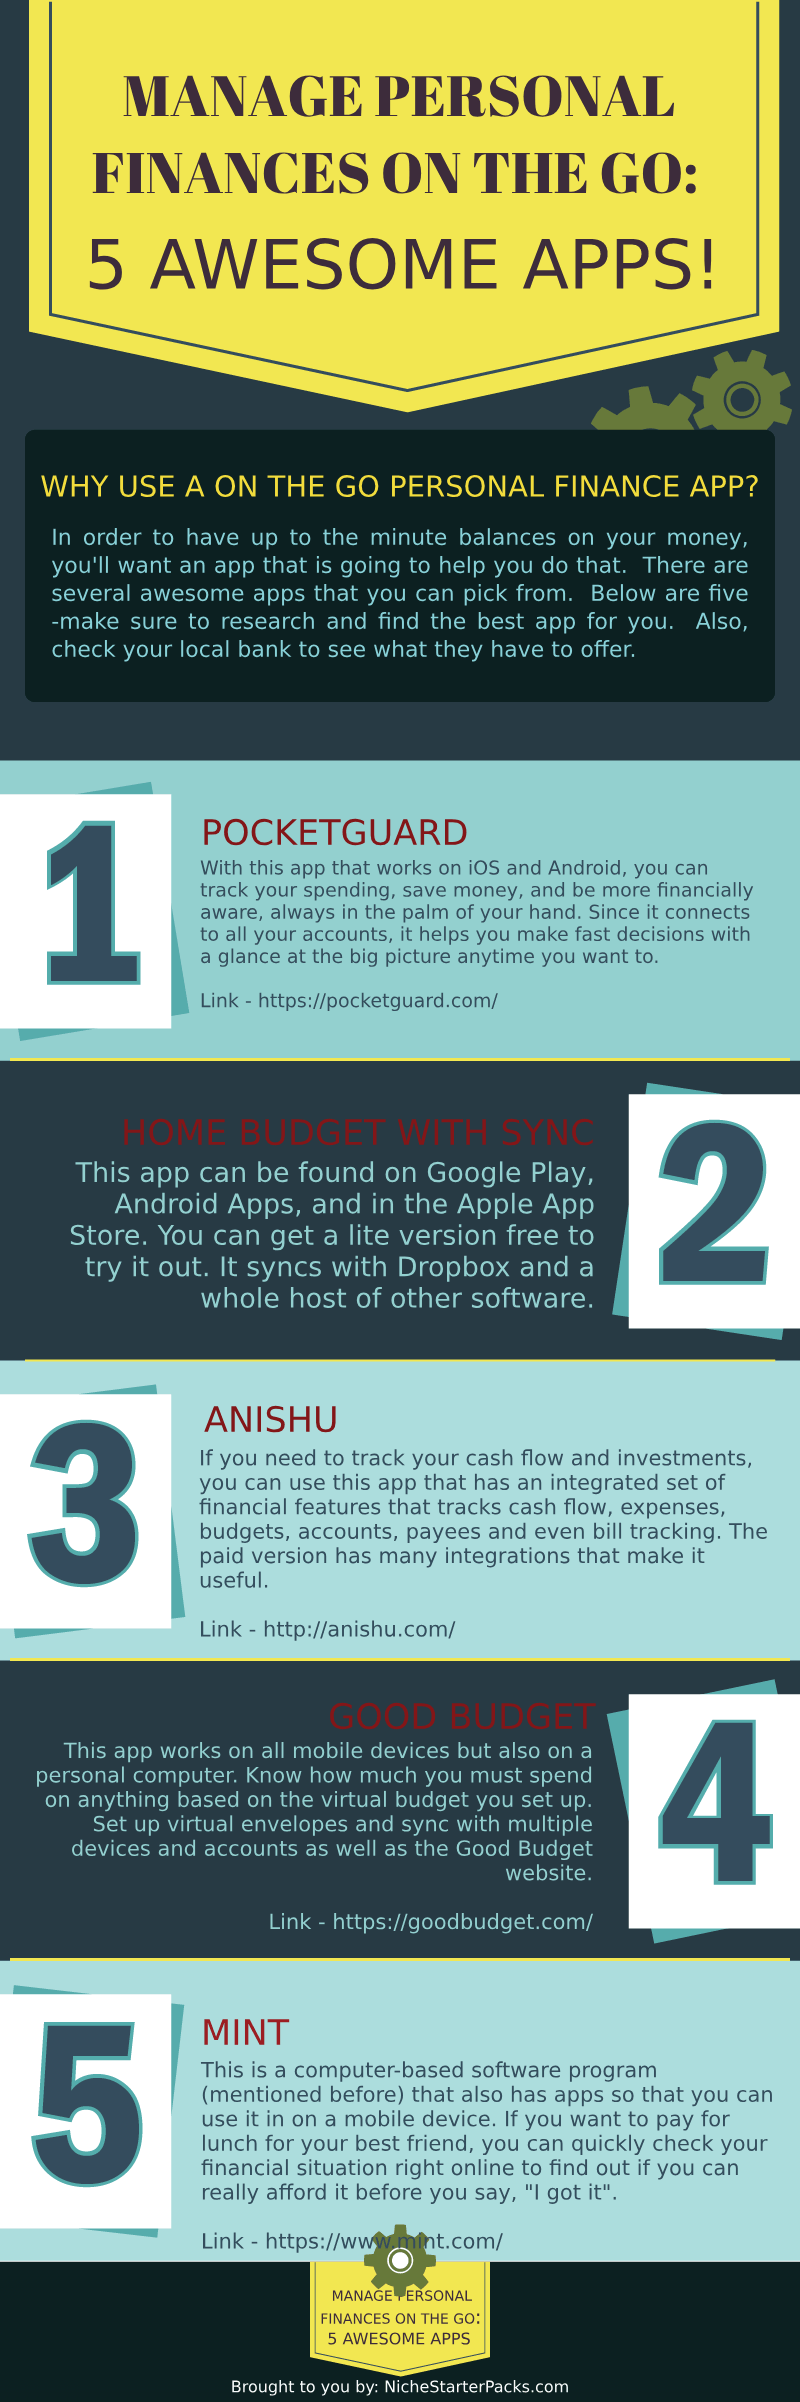
Here is what I came up with:
Step 4 – Don’t Forget To Add Your URL
Add your name at the bottom of the infographic. That way people know exactly where it came from and you can get traffic from it.
It’s important, so don’t forget. 🙂
Step 5 – Share, Share, Share
Download the images and start sharing.
I decided not to add images to my infographic, but it still has some valuable information that people are going to want. It has color and it definitely pops, so don’t feel like you have to add images to everything.
If you have any questions, please let me know.
~April
P.S. Don’t forget to check out the Niche Starter Packs Shop in order to find the perfect content for you to use to create your infographic.
Shop Our: