How to set up a funnel using plr
Do you struggle with figuring out what goes in a funnel? You want to set one up in your business you just don't know how.
I’ve got you covered!
Here is a Goal Setting Funnel that you can use in your business.
Take a look at the entire process below, then keep scrolling because I go into detail about how to do it, where to get the content and where to use it:

I’ve done all the work for you of figuring out what to purchase, how to set it up, and where to put each PLR product you now have.
Here are all the products in the funnel:
- Blog Posts: FREE 7 Day SMART Goals Pack
- Opt-In: Reignite Your Goal Setting Blog Series & Marketing Kit Save 50% with Coupon Code: GOALFUNNEL
- Tripwire: Set Your Goals Workbook
- Signature Course: Goal Setting Masterclass
- Downsell: DFY 14 Day Challenge: Reignite Your Goals
- Nurture Sequence: Email Carte (Coupon Code: AprilsFriendsPLR to save $50)
If you've ever built a funnel or products in general you know that there are different ways to do it.
In the steps below I'll do this in stages. The first stage is to get the blog posts, opt-in, and tripwire done. After that you're going to focus your energy on your signature course and the challenge.
I've set it up like this so that you can get money in as quickly as possible. It is far easier to create eBooks and digital products then a course. You can stop there or move to the next stage when you're done.
Let's begin...
The very first step for the entire process is to name your products.
To do this list out all of the proucts above and brainstorm ideas until one resonates with you for each one of the products you're going to put in your funnel.
You can use the same names, but it really is better to come up with your own.
The second step you'll need to do is figure out where to set it up and deliver your product.
Before I get into that I want to cover something that you're going to have to decide on how everything is going to be set up and delivered to your customers.
This blog post isn't going to go into setting up the shopping cart or syncing it with an autoresponder platform that is outside the scope of it, but you need to decide. I can suggest a few that will work easily for the digital download (opt-in and tripwire), as well as the downsell (email challenge), but I don't think these two options would work for the course, but I've included a third that has a lot of integration abilities that works well with teaching platforms.
About a year and a half ago ConvertKit started offering a way to set up and sell a product inside their platform. So you'd be able to do most of this funnel right inside this platform. As far as I can tell it doesn't allow you to set it up for affiliates to promote.
This is free to use until someone purchases and there there is a fee. It intergrates with ConvertKit. It will also deliver your products. You can set up a freebie as well as a paid product. If you used this you would have to come up with something for your course.
Sendowl is another great option. It will take payment and deliver your products. They have a monthly fee, but they also integrate with ConvertKit as well as quite a few other platforms. With this option you would have to use WordPress or something else for your pages because I don't think that SendOwl has that ability or option.
These three options I thought would be the easiest, but there are tons of ways to set this part of it up. Use whatever works for you or what you already have set up.
Now the fun begins!
Let's start....
create your opt-in & tripwire
Personalize Your Tripwire: Set Your Goals Workbook
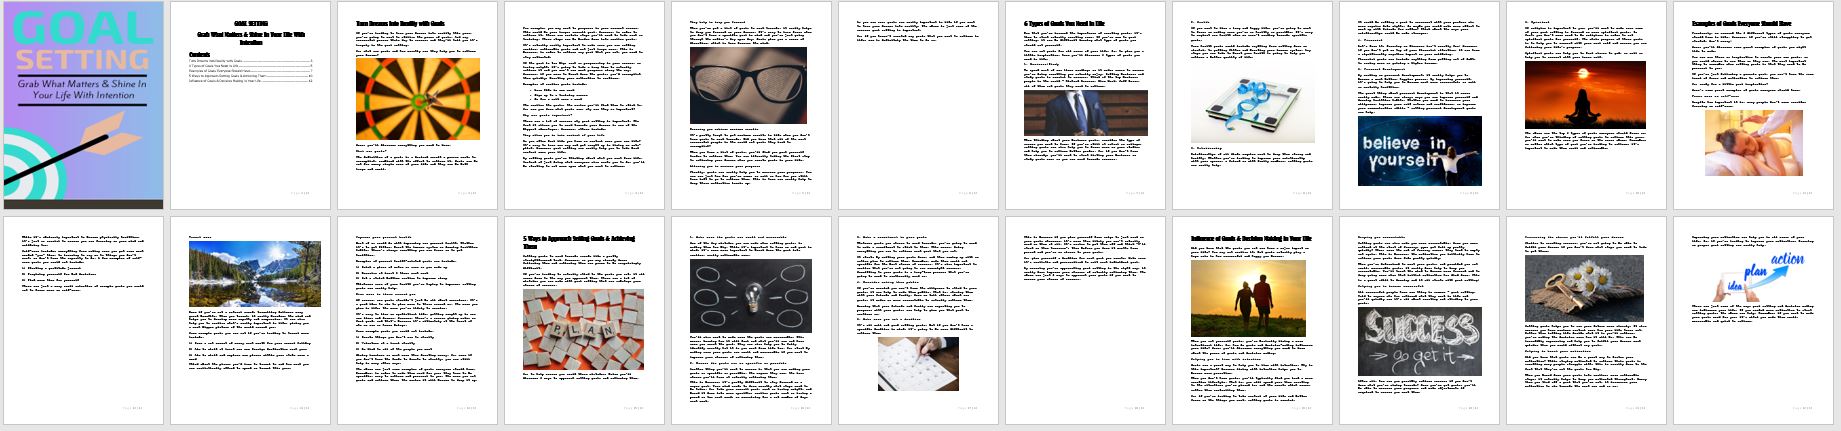
Since we'll be working in stages the first one woul be to set up the first two products. That means starting with the end which is the Set Your Goals Workbook from Lynette Chandler.
This is a beautifully designed planner that is going to help your people figure out what they really want in life. And then help them devise a plan of action to make it happen. They'll be able to print it right from their computer and people love planners and printables.
You can personalize this with your colors or any other way you want to, but you can also leave it as is because it is so beautiful.
The inside of your book is a great place to put a call to action or showcase another of your products or services. Normally I would talk about the Signature Masterclass inside and make sure to put an entire call to action page at the end - you won't have this information ready yet.
You can share something else like a coaching service, another product of yours that compliments this one, a pillar blog post about goals that will eventually have the Signature Masterclass links on it, or you can look for an affiliate program from someone else and earn affiliate commissions.
Depending on which of these options you pick when you're done with the entire funnel you can go back into your workbook and change the call to action and what you recommend or you can leave it as is. If you plan to go back - make a note somewhere so that the workbook can get updated.
When you're done. Save it as a PDF, then upload it to Amazon S3 or host it somewhere. If you're using one of the delivery option I suggested at the top: - ConvertKit, Gumroad, or SendOwl - then you'll just upload to their platform.
When you're done move to the next step.
Set Up The Tripwire

This part of the process and how you do it will really depend on where you're going to set it up.
Gumroad and ConvertKit will require you to have your tripwire sales copy wording done and ready because as you're setting up the product writing a description (sales copy) will be part of the process. You want to spend time on this for more sales. So when asked you can copy and paste what you're already come up with.
For SendOwl you will create a sales page, then add the buy buttons to it.
Once you've set up the product with one of these options you'll set up a thank you email with access to Set Your Goals Workbook.
If you're using SendOwl then they'll automatically send your new customer their access via email. I assume so will the other two options, but make sure to test it out so that you know what the process is for your customer.
You could integrate ConvertKit and send them a Welcome email with directions of how to download their product and where to download it.
With SendOwl you're able to limit the amount of downloads, let them know how many and if they can contact if when / if they reach that limit. This is their way of protecting your content.
Like I said you want to know the process for whatever platform you decide to work with.
After you're done with the welcome email it is a good idea to set up a nurture email sequence, you don't have to and can skip the two emails that come after this, but these emails are powerful for your audience. It is a way to get to know you and also a way for you to introduce or remind people about your next product or the Goals blog posts you're going to set up.
RESOURCE: If you want to include a nurture sequence. Check out EmailCarte because it has 101 Email Templates that you can use in your business including a Indoctrination Sequence (it is the 2nd set).
When you're done take the product page URL.
Customize The Opt-In For Your Funnel
After you're done with the tripwire you'll want to download it from the NSP Reignite Goals (Use Coupon Code: GOALFUNNEL to get 50% off) PLR pack. Then you're going to get the opt-in ready. The PLR pack comes with a 22-page enhanced report so that is what we'll be working in.
You'll want to change the eCover to reflect your branding, add a call to action for the Set Your Goals Workbook that is the tripwire part of your funnel. The next part will be to add the URL in the CTA.
When you're done with that I would also add an author page right after the eCover.
NINJA STRATEGY: At the end of the eBook add a What's Next promo page. This would promote the product you want to get the most sales from. I would add the tripwire now, then go back in and change it for the Goal Setting Masterclass when that is done because selling Goal Setting Masterclass is the main objective of this particular funnel.
You don't have to leave any of these wonderful products out because after that page you'll add a resource page on the last page of the book that has all of these products. That way they can pick them all up. You'll have to wait until all of your products are complete to add all of them. The resource page is also an excellent place to put affiliate offers.
Set Up The Opt-In

After the opt-in has been customized you'll want to set it up.
The first step is to create the opt-in form with your email autoresponder software. I use ConvertKit and love them.
Right now they have a free plan that has 1,000 subscribers. Join the FREE PLAN here.
Here's what you'll want to do:
1. Create an opt-in form
2. Then you'll want to create an email that sends subscribers the welcome email with the download link.
3. When you're creating the opt-in form and if you're in ConvertKit go into settings and click the incentive tab. The first option says: When a visitor subscribes to the form - it will default to the first option, but you want it to Redirect to an external page and add the product URL for the tripwire.
4. Turn on the opt-in form and email sequence. I don't know how it works for other email autoresponder platforms, but you have to turn everything on. So with convertKit make sure you've created an opt-in (under Grow) and publish it , set a rule (under Automate) and make it live (in the far right corner), then create the sequence (under Send), set the day / time to send the email (for immediately you need to add it as 0 hours), then Publish each email.
Add the form is easy with ConvertKit if you download the WordPress Plugin they have. Plus you can set up tags for each page.
5. Test your opt-in and make sure that everything is set up properly and that people will get the emails immediately.
NINJA STRATEGY: Also, create a landing page and then set up the same sequence above. If you do that then you're not just limited to sharing the blog posts after you've added them to your site. You can share the landing page in emails, on social media platforms, and even in the blog posts through links.
Schedule The Blog Posts

You'll want to gain interest and the perfect way to do that is on your site with blog posts.
Take a look at these two PLR products:
Piggy Makes Bank has a 7 Day Free Setting SMART Goals PLR pack you're going to want to grab. You're going to use this content in a couple of different places, so make sure to download it immediately.
You could also use the Reignite Goals blog posts that you used or the opt-in. Since you already own the content you might as well add the blog posts to your site.
To use you'll want to start personalizing the content by adding your stories, opinions, and any resources that you think would work well with the blog posts. Also, make sure to start linking the blog posts together so that your readers know which blog post to go to next.
Be unique by combining a couple of the blog posts to make them an ultimate post or a pillar post. You could also break them up, delete some of the paragraphs, rearrange them and so much more.
At the end of each post you're going to add an opt-in form code.
If you did the NINJA STRATEGY step above, I would also sprinkle the opt-in landing page URL in the text of the blog post.
Two Ways To Use The Emails
The free 7 Day Free Setting SMART Goals PLR pack comes with an email series about goal setting. I would use these in two ways.
Set these up as a challenge series in my email autoresponder series (see steps above). Instead of creating an opt-in form, I would make a tag with rules for this. I would set a rule up that if they click on this tag they would be set up for this 7-day email series.
Then in the welcome series above I would ask them if they would like join this challenge. Add a JOIN NOW button in ConvertKit. Make sure that button is tagged. By doing these things it will automatically put them into the challenge series sequence that you set up. You could take them out of the rest of the welcome series above by making the rule for that or have them go through both.
You will use this email challenge series to share your workbook with them or an affiliate offer. This series also takes highlights the blog posts that you've added to your blog.
The second way that I would use this is for promotional pieces on Facebook.
Take the actionable content they have for each day - post it. Then instead of promoting the blog post or email challenge, promote your workbook or when you have one of the other course set up promote those. You might have to re-word these slightly to fit this method. To do that take out any reference of the email or blog posts.
Start Promoting Your Goal Product
Now is the time to start promoting your product.
Don't be shy. People want to start planning and making goals.
Start sharing with the people on your email list right now.
You'll want to share all parts of the funnel. The blog post, the opt-in, the tripwire, everything. Share it on your Facebook stories, in your Facebook group and on your Facebook page. Talk about it on Instagram in your feed, create a story and a reel. You could print it out and make videos of yourself writing in it.
Republish the blog posts at Medium.com.
Make a TikTok video or a YouTube video.
Use mockups to promote your product. You can find great ones at Dragonfly Design Labs or these Etsy Mockups HERE.
If you used a platform that has an affiliate program, ask people to help you share the word about your Goal Workbook or the Opt-In.
Create an Etsy store and add them to that.
Set up PINS for each blog post topic and then send traffic to those. Also create a PIN that says they'll get a free report and send them to the landing page. You can use one of the Canva mockup templates from the sites above.
Brainstorm a huge list of traffic ideas and start working through them. You probably won't use them all, but you'll want to spread the word.
The next step is creating the signature masterclass and 14 day challenge downsell. That is coming soon....
Until then have a great and prouctive day!
~April
GET MY DAILY PLR DEALS
(PLUS TIPS, TRICKS & TECHNIQUES TO USE PLR)
How To Use PLR, PLR TipsPosted in 0 comments
Shop Our: